Chef Dalila
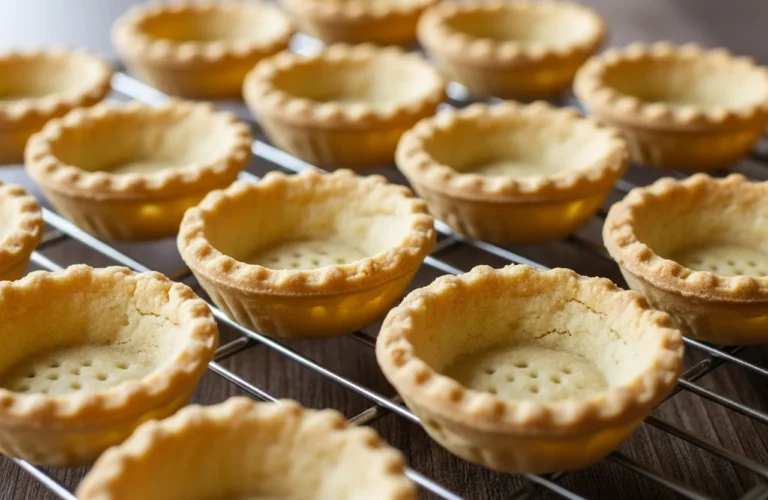
HOW TO MAKE MINI TART SHELLS might seem like a fiddly task, but I promise you, it’s a culinary superpower worth having in your back pocket. There’s something undeniably charming about a perfectly formed, bite-sized tart, isn’t there? Here at Let Them Cooke, we believe that incredible desserts don’t have to be intimidating.
Learning to make mini tart shells opens up a world of sweet and savory possibilities, transforming ordinary gatherings into elegant affairs with minimal fuss. This guide will show you exactly how to make mini tart shells that are crisp, golden, and ready for any filling you can dream up.
What are mini tart shells and why are they a dessert essential?
Mini tart shells are essentially miniature versions of their larger counterparts: a crisp, buttery pastry base designed to hold a variety of fillings. They’re the unsung heroes of any dessert spread, offering individual portions of pure delight. When you know how to make mini tart shells, you’re not just baking; you’re crafting edible jewels.
The Allure of Petite Pastries
Think about it: who doesn’t love a tiny treat? Mini tart shells provide that perfect, controlled portion, allowing guests to sample several flavors without feeling overwhelmed. This makes knowing how to make mini tart shells incredibly valuable for entertaining, offering a touch of elegance that feels special yet approachable. Plus, they’re just plain cute!
Versatility on a Platter
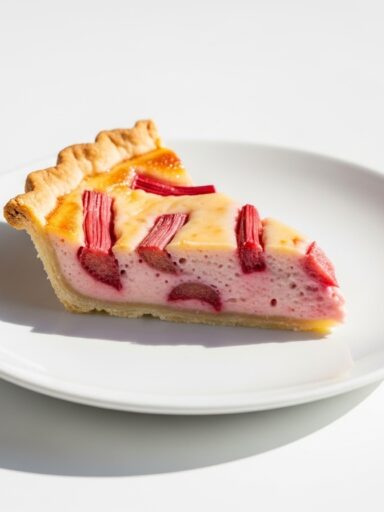
From a vibrant lemon curd to a rich chocolate ganache, the filling options for mini tart shells are truly endless. Mastering how to make mini tart shells means you’re always prepared for any occasion. These little wonders can be filled ahead of time, making party prep a breeze. Imagine serving delicate Mini Fruit Tarts With Pastry Cream or luxurious Raspberry Vanilla Tarts – all thanks to your flawless mini tart shells.
Beyond Just Sweet: Savory Delights
Don’t pigeonhole your mini tart shells to just desserts! They’re fantastic for savory appetizers too. Think quiches, cheese tarts, or even tiny shepherd’s pies. Learning how to make mini tart shells means you’re equipped for both sweet tooth cravings and elegant canapés. A batch of perfectly baked homemade tartlet shells is a true culinary asset.
What essential ingredients and tools do you need to craft perfect mini tart shells?
Before you dive into the delightful process of how to make mini tart shells, let’s gather our arsenal. The beauty of a great mini tart crust recipe lies in its simplicity, but quality ingredients and the right tools make all the difference. You’ll soon see how these basics come together to create magic.
The Foundation: Simple, Quality Ingredients
For a classic pâté sucrée recipe, you’ll need butter (unsalted and cold is key!), all-purpose flour, a touch of sugar, an egg yolk, and a pinch of salt. That’s it! These simple components, when handled correctly, are what transform into those gorgeous mini tart shells you’re dreaming of. Using cold butter ensures a flaky tart dough, which is non-negotiable for success.
Must-Have Baking Tools for Tartlets
You don’t need a professional kitchen, but a few specific tools will streamline your process. A good rolling pin, a pastry blender or food processor, and parchment paper are essential. For consistent results, a kitchen scale is your best friend when learning how to make mini tart shells, ensuring precise measurements for your mini tart crust recipe.
Choosing Your Tart Shell Molds
This is where the mini magic truly happens. You can use mini muffin tins, specialized mini tart molds with removable bottoms, or even silicone molds. The removable bottom molds are a game-changer for easy demolding, preventing breakage. When deciding how to make mini tart shells, consider investing in these for a stress-free experience. If you’re curious about alternatives, check out how to make tartlet shells even without specialized equipment.
How do you master the dough and blind-baking techniques for flawless mini tart shells?
This is the heart of the matter – the technique that separates good mini tart shells from absolutely incredible ones. Don’t fret; with a few pointers, you’ll be a pro in no time. Mastering how to make mini tart shells is all about patience and precision, especially during the dough and blind-baking stages.
Crafting the Flaky Tart Dough
Start by cutting your cold butter into small cubes and working it into the flour and sugar mixture. You can use your fingertips, a pastry blender, or a food processor until the mixture resembles coarse meal with some pea-sized butter chunks remaining. This is the secret to a flaky tart dough. Incorporate the egg yolk and a splash of ice water just until the dough comes together. Overworking the dough is the enemy of tender mini tart shells, so mix just enough. This homemade tartlet shells base is your canvas.
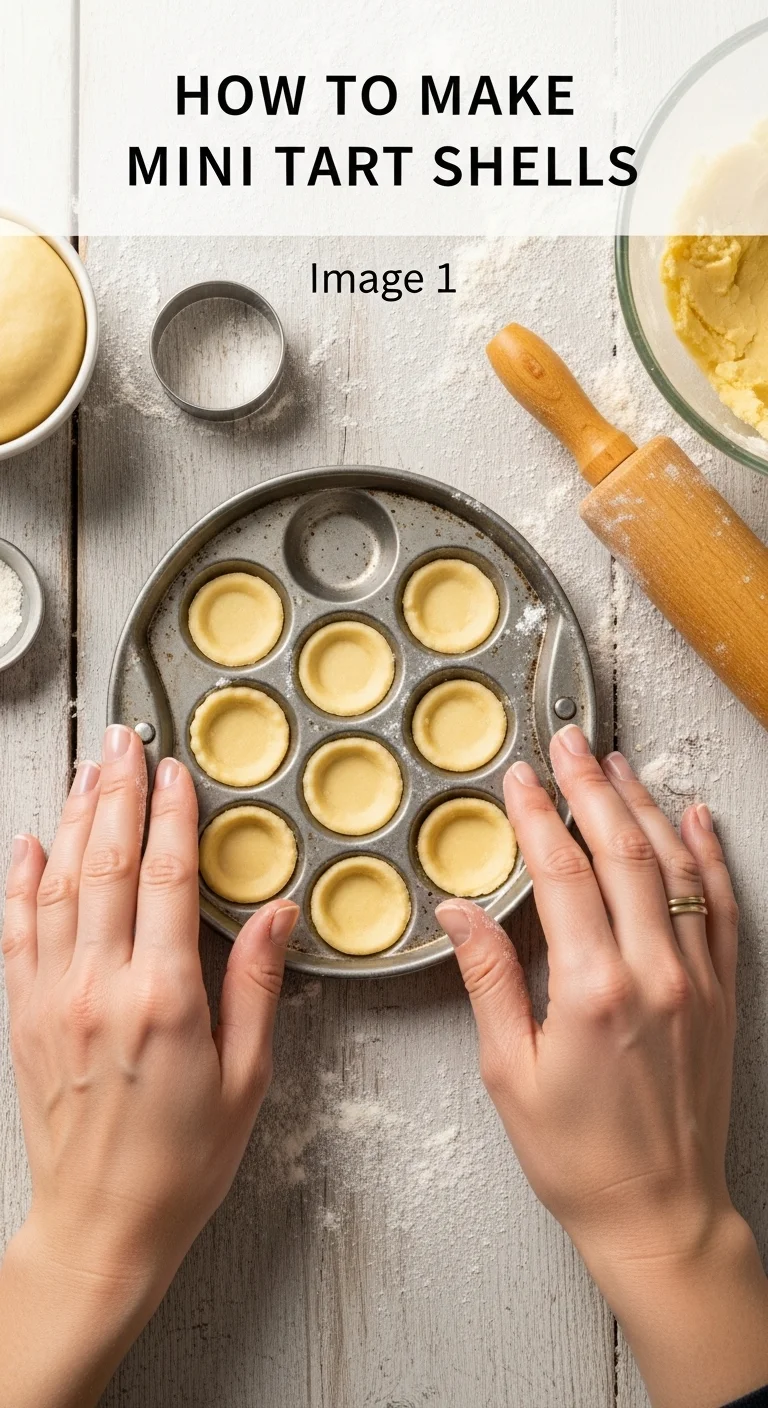
Pressing and Trimming with Precision
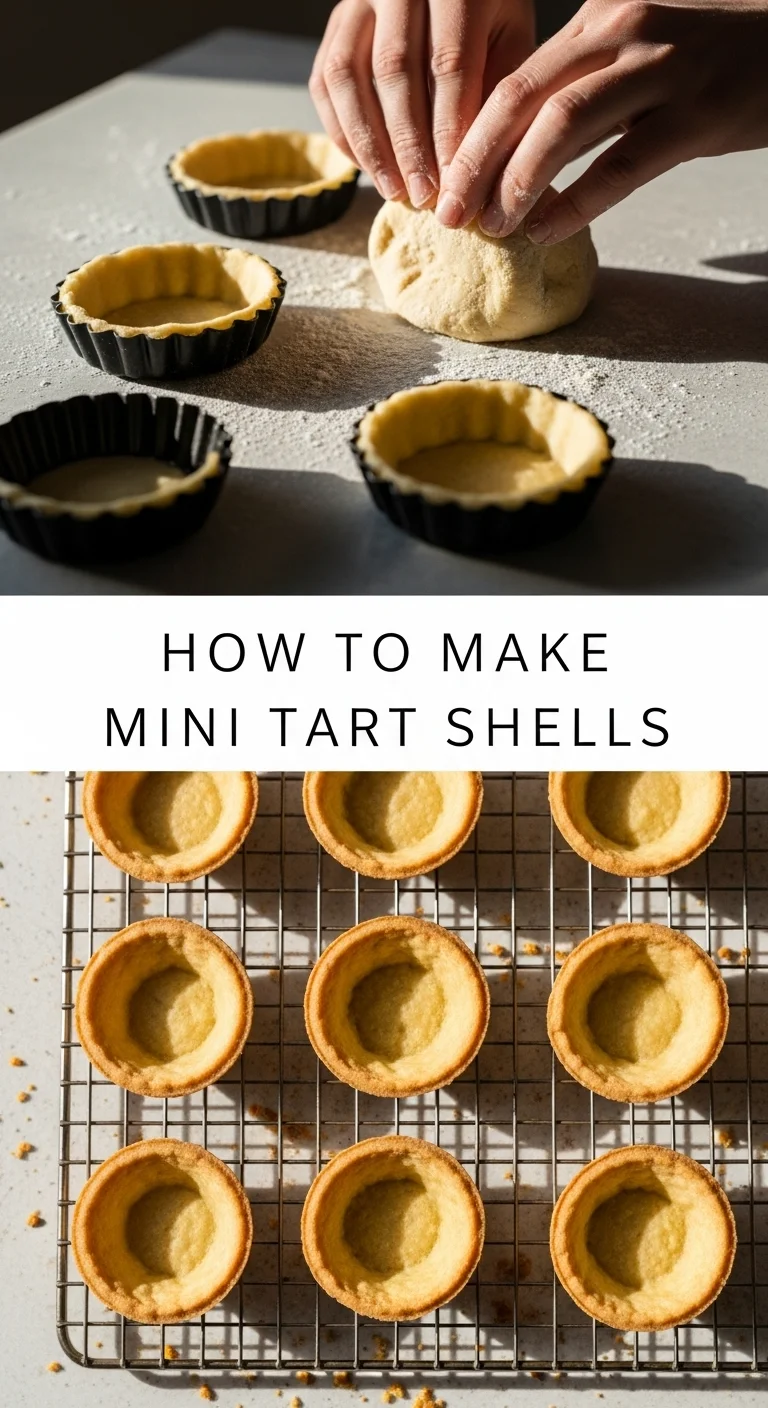
Once chilled, roll out your dough thinly on a lightly floured surface. Using a round cutter slightly larger than your tart shell molds, cut out your circles. Gently press each circle into the molds, ensuring the dough fits snugly against the bottom and sides. Trim any excess dough with a small knife or by rolling your pin over the top of the molds. This meticulous step ensures uniformly perfect mini tart shells.
The Blind Baking Techniques Decoded
Blind baking is crucial for preventing soggy bottoms and ensuring your mini tart shells hold their shape. Prick the bottom of each shell with a fork, then line them with parchment paper and fill with pie weights, dried beans, or even rice. Bake until the edges are lightly golden, then remove the weights and parchment. This initial bake sets the structure, ensuring your mini tart crust recipe yields a sturdy foundation.
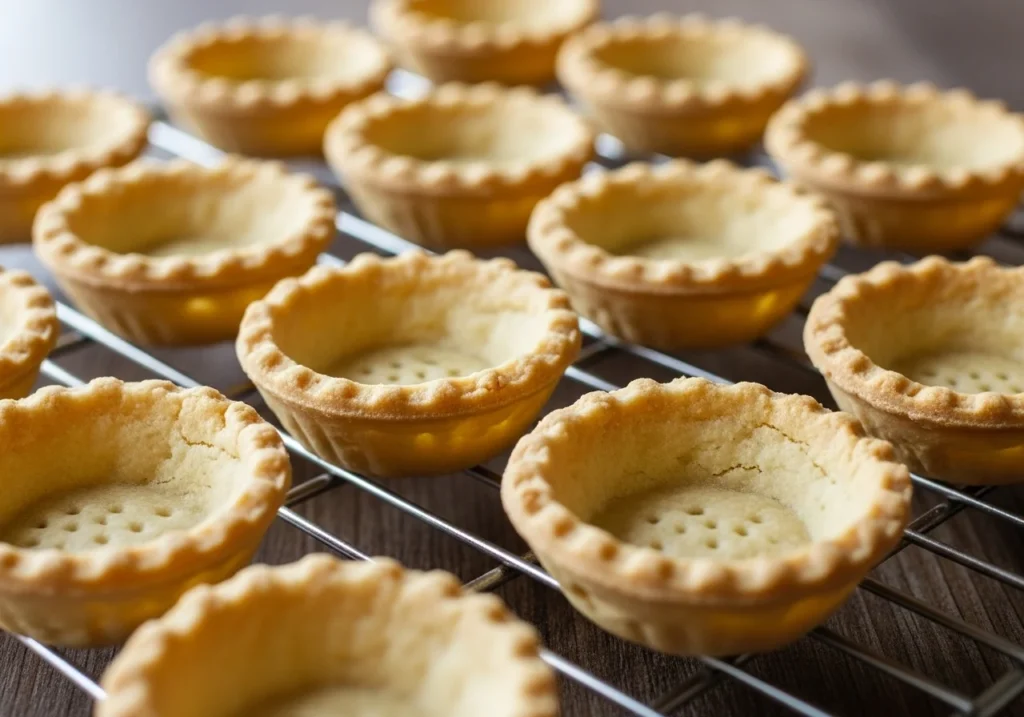
Achieving That Golden Finish
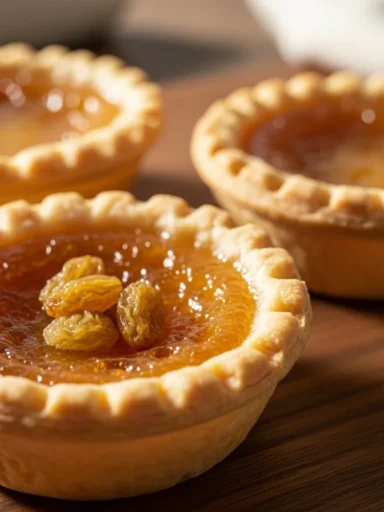
After removing the weights, return the mini tart shells to the oven to finish baking until they are golden brown and crisp throughout. This second stage of blind baking is vital for achieving that desirable crunch. If you skip this, even the best efforts on how to make mini tart shells can result in a pale, undercooked base. A perfectly golden shell is ready for a luscious Mango Curd Tart Recipe or bright Lemon Tartlets Recipe.
What common pitfalls should you avoid when making mini tart shells, and how can you troubleshoot them?
Even seasoned bakers hit a snag now and then. The journey of how to make mini tart shells is rarely without its minor challenges, but knowing how to troubleshoot them is what builds confidence. Let’s tackle the common issues head-on so your next batch is flawless.
The Dreaded Shrinkage: Why it Happens
Ever pull your mini tart shells from the oven only to find they’ve shrunk into sad, squat versions of their former selves? This usually happens if the dough wasn’t chilled enough or was overworked. Always chill your dough thoroughly before rolling and after placing it in the molds. This relaxes the gluten and helps the mini tart shells retain their shape. Proper blind baking techniques also play a huge role in preventing shrinkage.
Soggy Bottoms No More
A soggy bottom is the bane of any tart lover’s existence. The best way to avoid this when learning how to make mini tart shells is thorough blind baking. Make sure your shells are fully baked and golden before adding any wet filling. For very wet fillings, a thin layer of melted chocolate or a sprinkle of finely ground nuts on the bottom of the baked shell can create a protective barrier. This ensures your Cherry Bakewell Tartlets stay crisp.
Cracks and Collapses: Prevention and Repair
Cracks can occur if the dough is too dry or if the shells are handled roughly while hot. If you notice small cracks in your raw dough, dab a tiny bit of water on your finger and gently press the crack together. For baked mini tart shells, a tiny dab of melted chocolate or a bit of royal icing can beautifully mask imperfections, making them ready for a delightful Mini Lemon Meringue Tarts filling. Proper handling is key to successful troubleshooting tart shells.
How can you innovate with flavor variations and fillings to elevate your mini tart shells?
Now that you’re a master of how to make mini tart shells, it’s time to unleash your creativity with fillings. The shell is merely the vessel; the filling is the soul. This is where your individual style can truly shine, transforming a simple mini tart into an unforgettable experience.
Sweet Sensations: Endless Filling Possibilities
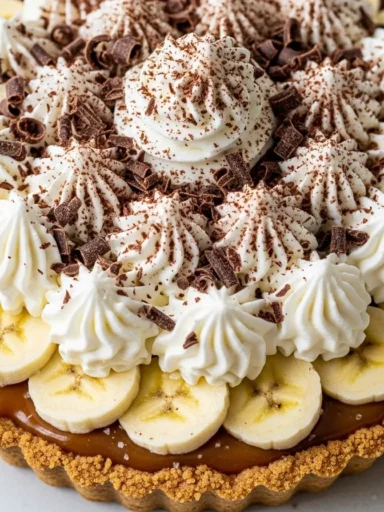
Beyond classic fruit curds and ganaches, consider pastry cream, mousses, or even a simple fresh fruit medley. Think about seasonal ingredients: berries in summer, apples and caramel in fall. Imagine a rich Mom’s Old Fashioned Butter Tarts filling, or perhaps some decadent Raisin Butter Tarts. The possibilities for your mini tart shells are limited only by your imagination. “A tart shell is a blank canvas,” as my grandmother used to say, “ready for whatever sweet story you want to tell.”
Savory Surprises: Beyond Dessert
Don’t forget the savory side! Mini quiches with different cheeses, herbs, and vegetables are always a hit. You could do tiny individual pizzas or even savory custards with bacon and gruyere. Knowing how to make mini tart shells means you can whip up elegant appetizers that are sure to impress. These homemade tartlet shells are perfect for any occasion, from brunch to cocktail parties.
The Art of the Garnish
Once filled, the final touch is the garnish. A dusting of powdered sugar, a dollop of whipped cream, fresh berries, a sprig of mint, or a delicate chocolate curl can elevate your mini tart shells from delicious to absolutely stunning. Thoughtful garnishing completes the picture, making your beautiful How to Make the Best Homemade Fruit Tart truly shine.
Key Takeaways
- Chill your dough: This is paramount for preventing shrinkage and ensuring a flaky texture when you how to make mini tart shells.
- Blind bake thoroughly: Don’t skimp on this step; it’s the secret to crisp, non-soggy mini tart shells.
- Use quality ingredients: Simple ingredients shine brightest in a classic mini tart crust recipe.
- Invest in good molds: Tart shell molds with removable bottoms make demolding a breeze.
- Get creative with fillings: The versatility of mini tart shells is their greatest strength; explore both sweet and savory options.
Mini Tart Shells
Ingredients
Method
- Cut cold butter into small cubes and work into the flour and sugar mixture until it resembles coarse meal.
- Incorporate egg yolk and a splash of ice water, mixing just until the dough comes together.
- Chill the dough for at least 30 minutes.
- Roll out chilled dough on a lightly floured surface to a thin layer.
- Cut out circles larger than the molds and press them into the tart shell molds.
- Trim excess dough with a knife or rolling pin.
- Prick the bottoms of the shells with a fork and line them with parchment paper.
- Fill with pie weights and blind bake at 350°F (175°C) until edges are lightly golden.
- Remove weights and parchment, then return to the oven to further bake until golden brown all over.