Chef Dalila
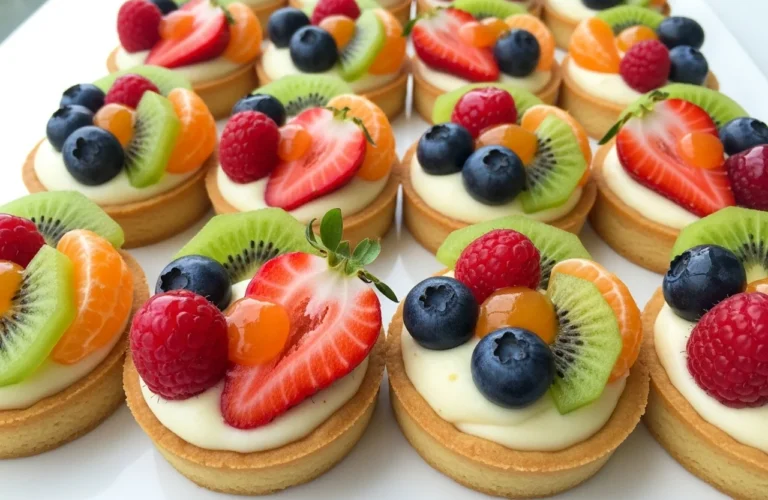
Mini Fruit Tarts With Pastry Cream are little jewels, miniature works of art that always steal the show at any gathering. If you’ve ever dreamt of creating those picture-perfect, gourmet mini desserts that look like they’ve been plucked from a Parisian patisserie window, you’ve landed in the right spot here at Let Them Cooke.
Today, we’re diving deep into the delightful world of homemade mini tarts, uncovering the secrets to making Mini Fruit Tarts With Pastry Cream that are not just beautiful, but utterly delicious. Get ready to impress your friends and family with these easy dessert tarts.
What makes Mini Fruit Tarts With Pastry Cream an irresistible and elegant dessert choice?
There’s a certain magic to Mini Fruit Tarts With Pastry Cream. They’re individual portions of pure joy, offering a delicate balance of textures and flavors that larger desserts often miss. Each bite is a perfectly composed symphony of sweet, creamy, and tart.
The Allure of Individual Portions
Think about it: no slicing, no messy plates, just a perfect little treat designed for one. This makes Mini Fruit Tarts With Pastry Cream ideal for parties, brunches, or even a fancy afternoon tea. They feel special and considered, a true testament to elegant entertaining.
A Feast for the Eyes and Palate
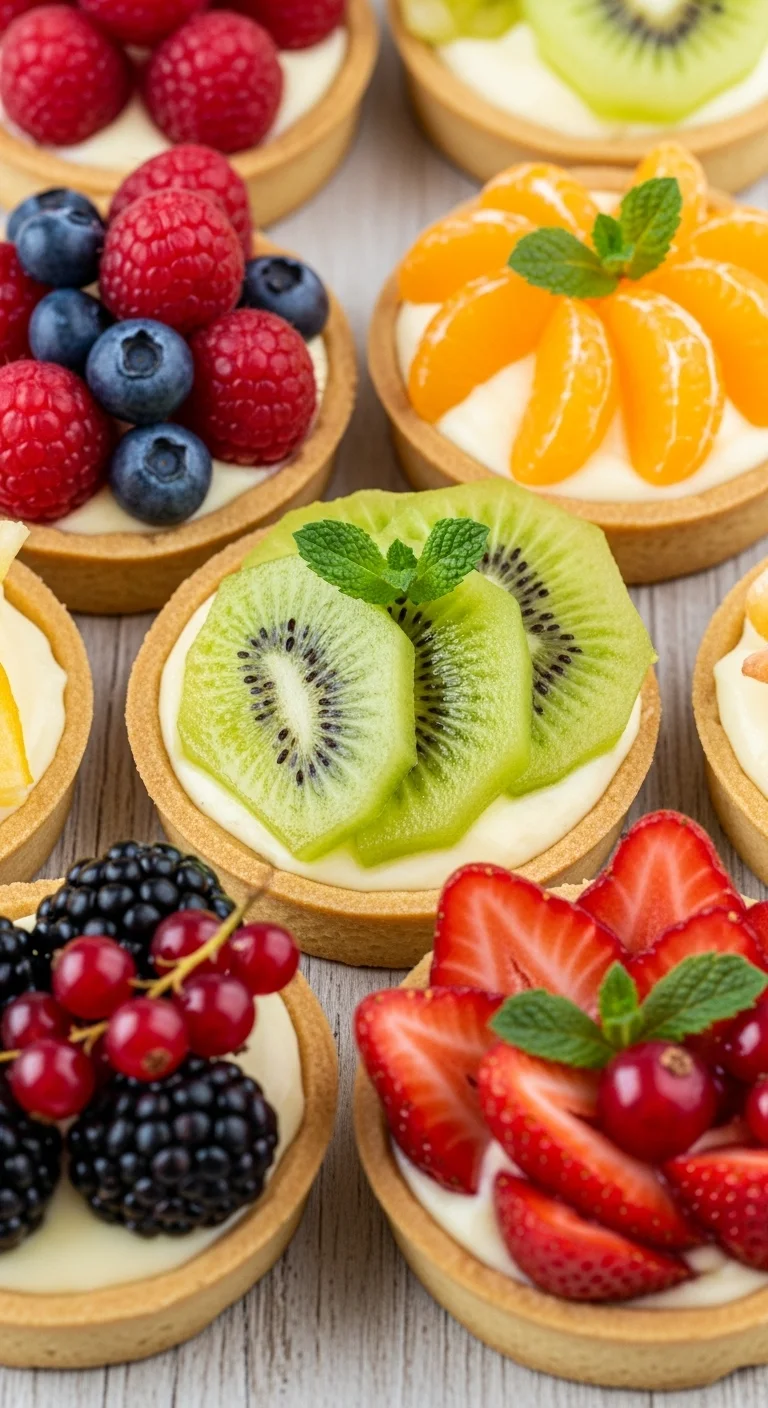
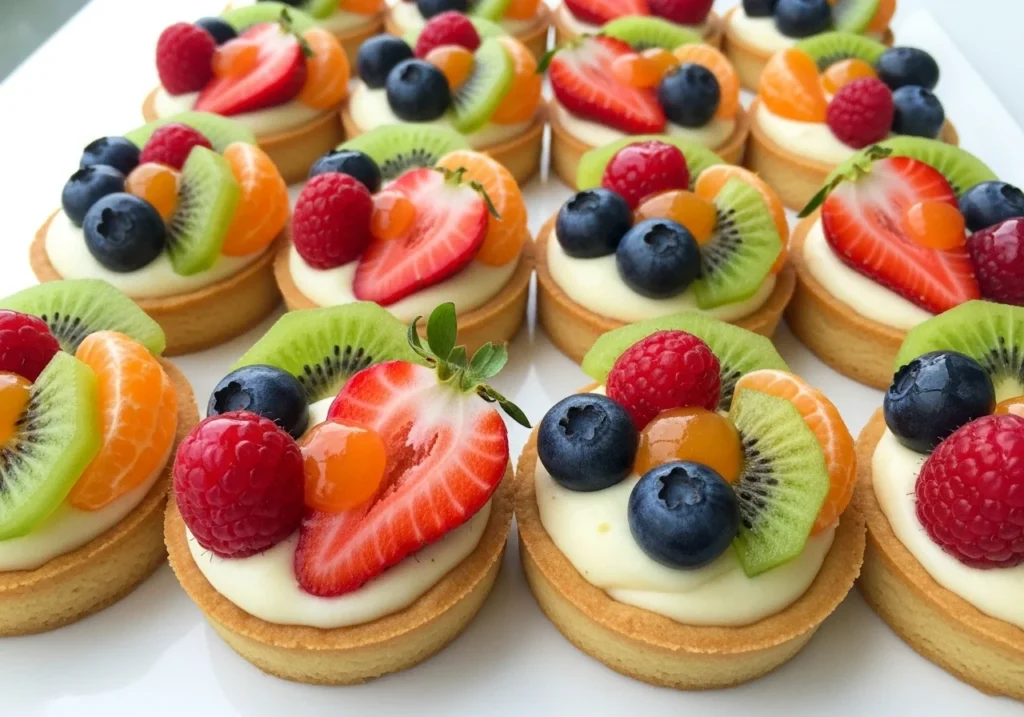
Beyond their convenience, these fresh fruit tartlets are a visual delight. The vibrant colors of fresh berries, kiwis, and mandarins against the pale yellow of the vanilla pastry cream are simply stunning. Every single Mini Fruit Tarts With Pastry Cream is a miniature canvas.
The Perfect Balance of Flavors and Textures
The crisp, buttery tart shell, the smooth, rich pastry cream, and the burst of fresh fruit create an incredible mouthfeel. This interplay of crunchy, creamy, and juicy is what elevates Mini Fruit Tarts With Pastry Cream from a simple dessert to an unforgettable experience. For another delightful tart experience, check out our Mango Curd Tart Recipe.
How do you achieve the silkiest, most flavorful pastry cream that elevates every bite?
Ah, pastry cream! The heart and soul of any good Mini Fruit Tarts With Pastry Cream. A truly silken, flavorful vanilla pastry cream recipe is what separates a good tart from a truly magnificent one. It’s all about patience and technique.
The Art of the Perfect Vanilla Pastry Cream Recipe
Starting with quality ingredients is non-negotiable. Fresh egg yolks, real vanilla bean (or good quality extract), whole milk, and sugar are your building blocks. Whisking constantly over medium heat is crucial to prevent lumps and ensure even cooking. The goal is a thick, glossy cream that coats the back of a spoon beautifully.
Tempering for Smoothness and Richness
Tempering the egg yolks with hot milk is key to preventing scrambled eggs. Slowly stream the hot milk into the yolks while whisking vigorously. This gentle introduction of heat ensures a smooth, creamy base for your Mini Fruit Tarts With Pastry Cream. Don’t rush this step!
Cooling and Straining for Silky Perfection
Once cooked, immediately strain your pastry cream through a fine-mesh sieve. This removes any tiny lumps and ensures that coveted silky texture. Press plastic wrap directly onto the surface of the cream to prevent a skin from forming as it cools. This step is vital for the best Mini Fruit Tarts With Pastry Cream.
What are the secrets to crafting perfectly crisp and golden mini tart shells from scratch?
The foundation of any stellar Mini Fruit Tarts With Pastry Cream is its shell. A perfectly crisp, buttery tart shell provides the ideal counterpoint to the soft cream and fruit. We’re talking about a pate sablée recipe here, and getting it right makes all the difference.
Mastering the Pate Sablée Recipe
Pate sablée, a sweet shortcrust pastry, is surprisingly simple but requires a gentle touch. The key is to work quickly and keep your ingredients cold. Overworking the dough develops gluten, leading to tough shells – a big no-no for your Mini Fruit Tarts With Pastry Cream. If you’re looking for more guidance, our article on HOW TO MAKE MINI TART SHELLS is a great resource.
Blind Baking for a Flawless Foundation
Blind baking is your best friend when making homemade mini tarts. This technique prevents the shells from puffing up and ensures a crisp, golden base. Line your tartlet shells with parchment paper and fill them with pie weights or dried beans. Bake until lightly golden, then remove the weights and bake a little longer until truly crisp. This prepares them perfectly for your Mini Fruit Tarts With Pastry Cream.
Tart Shell Baking Tips for Crispness
Don’t skip the chilling time! Chilling the dough before rolling and again after forming the shells helps prevent shrinkage in the oven. Also, ensure your oven is preheated to the correct temperature. A proper bake ensures your Mini Fruit Tarts With Pastry Cream shells are sturdy enough to hold their delicious fillings. Learn more about how to make tartlet shells for various recipes.
How can you beautifully assemble and decorate your Mini Fruit Tarts with fresh, vibrant fruits?
Assembling Mini Fruit Tarts With Pastry Cream is where your artistic flair truly shines. This is where you transform simple components into dazzling gourmet mini desserts. The goal is a balance of aesthetics and taste.
Filling and Arranging for Visual Appeal
Once your tart shells are cool and your pastry cream is chilled, it’s time to fill. Pipe or spoon the vanilla pastry cream into each shell, smoothing the top. Then, arrange your fresh fruit tartlets. Think about color, shape, and height. Overlapping slices of kiwi, neatly arranged raspberries, or a fan of strawberry slices can make a huge impact on your Mini Fruit Tarts With Pastry Cream. For another fruity option, consider our Raspberry Vanilla Tarts.
Choosing the Freshest, Most Vibrant Fruits
The quality of your fruit makes all the difference. Opt for seasonal, ripe, and blemish-free fruits. Berries (strawberries, raspberries, blueberries), kiwi, mandarins, and grapes are classic choices for Mini Fruit Tarts With Pastry Cream. Their natural sweetness and slight tartness perfectly complement the rich cream. This attention to detail elevates your easy dessert tarts.
The Finishing Touches: Glaze and Garnish
For that professional sheen, lightly brush your finished Mini Fruit Tarts With Pastry Cream with a warm apricot glaze or a simple clear fruit glaze. This not only adds a beautiful shine but also helps to preserve the freshness of the fruit. A tiny sprig of fresh mint can add a pop of green and an aromatic touch, making them truly gourmet mini desserts. “The secret ingredient is always love, but a good glaze doesn’t hurt either,” quipped a famous pastry chef.
What are the best tips for storing, serving, and customizing your Mini Fruit Tarts for any occasion?
You’ve put in the work, now let’s make sure your Mini Fruit Tarts With Pastry Cream stay perfect until they’re devoured. Proper storage and thoughtful presentation are key to enjoying these delightful treats.
Optimal Storage for Freshness
Mini Fruit Tarts With Pastry Cream are best enjoyed the day they are made. However, if you need to store them, keep them in an airtight container in the refrigerator for no more than 1-2 days. The tart shells can soften over time, so assemble them as close to serving as possible. This is crucial for maintaining the integrity of your fresh fruit tartlets.
Serving Suggestions for Any Event
Serve your Mini Fruit Tarts With Pastry Cream chilled, directly from the refrigerator. Arrange them on a beautiful platter or tiered stand for an impressive display. They’re perfect as a standalone dessert, part of a dessert buffet, or even as a delightful accompaniment to coffee or tea. Think about pairing them with other small bites like Mini Lemon Meringue Tarts or Cherry Bakewell Tartlets.
Customizing Your Tarts for Unique Flavors
Don’t be afraid to get creative with your Mini Fruit Tarts With Pastry Cream! Experiment with different pastry cream flavors – a hint of lemon zest, almond extract, or even a touch of chocolate. You can also vary the fruit combinations, perhaps adding a layer of fruit curd under the pastry cream for an extra tang.
Our recipe for Lemon Tartlets Recipe offers more ideas for citrusy variations. For a truly unique twist, consider our Raisin Butter Tarts or even Mom’s Old Fashioned Butter Tarts if you’re feeling adventurous. For more comprehensive tart advice, check out How to Make the Best Homemade Fruit Tart.
Key Takeaways
- Start with quality ingredients for both the pate sablée and vanilla pastry cream recipe.
- Blind bake tart shells thoroughly to ensure a crisp, sturdy foundation for your Mini Fruit Tarts With Pastry Cream.
- Temper egg yolks carefully for a lump-free, silky smooth pastry cream.
- Strain pastry cream after cooking and cover directly with plastic wrap to prevent skin formation.
- Arrange fresh fruit artfully for maximum visual appeal and vibrant flavor in your fresh fruit tartlets.
- Apply a light glaze to your Mini Fruit Tarts With Pastry Cream for shine and fruit preservation.
- Assemble close to serving and store chilled to maintain the best texture and freshness of these gourmet mini desserts.
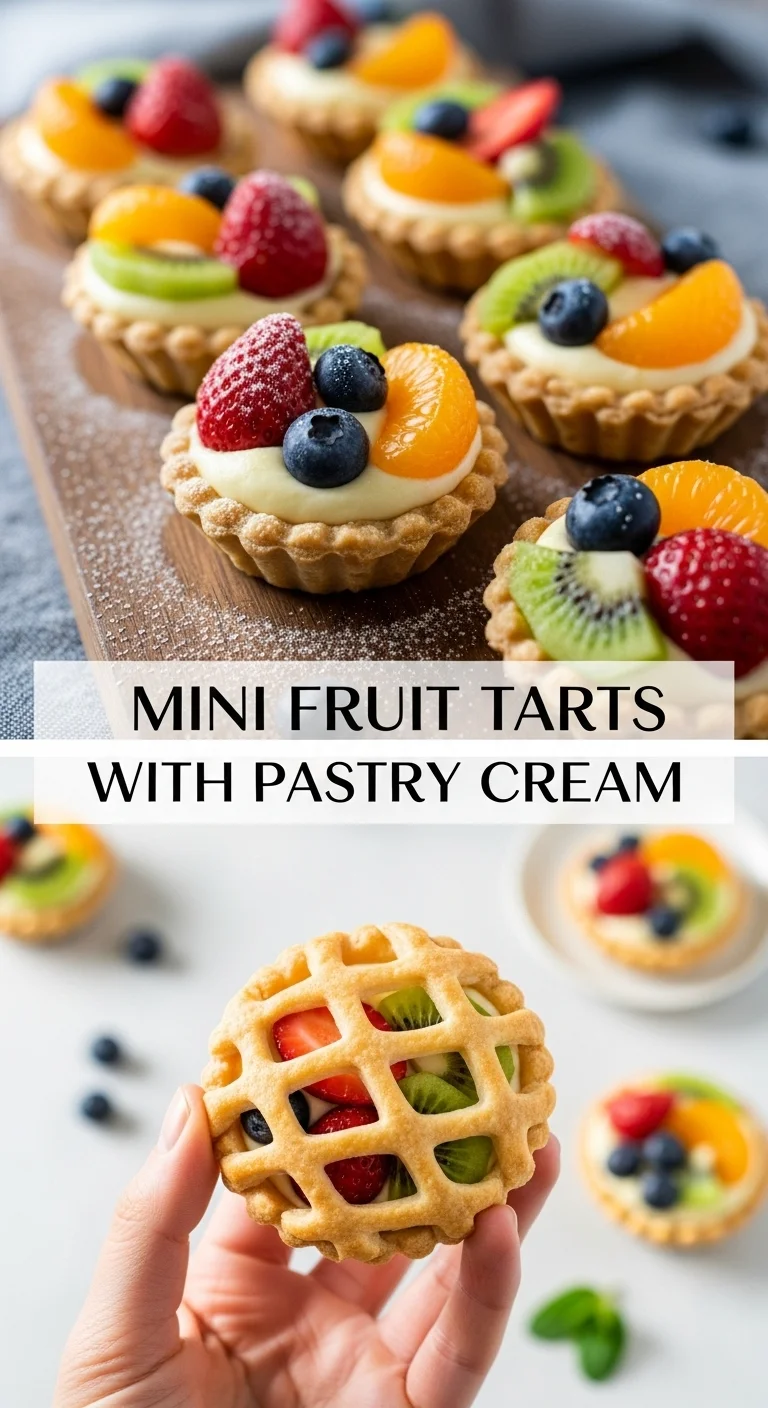
Mini Fruit Tarts With Pastry Cream
Ingredients
Method
- In a medium saucepan, heat the milk until simmering.
- In a bowl, whisk egg yolks, sugar, and cornstarch until smooth.
- Temporarily combine hot milk with egg mixture while whisking to temper the eggs.
- Return the mixture to the saucepan and cook over medium heat until thickened.
- Stir in the vanilla extract, then strain through a fine-mesh sieve.
- Cover with plastic wrap pressed against the surface and cool.
- In a mixing bowl, combine flour, powdered sugar, and salt.
- Cut in the cold butter until the mixture resembles coarse crumbs.
- Add the egg and mix until the dough comes together.
- Chill the dough in the refrigerator for at least 30 minutes.
- Roll out and fit into tartlet pans, then chill again.
- Blind bake the tart shells lined with parchment and weights until golden.
- Once shells are cooled, fill each with cooled pastry cream.
- Artfully arrange fresh fruit on top of the pastry cream.
- Lightly brush with apricot glaze for shine.
- Garnish with fresh mint.