Chef Dalila
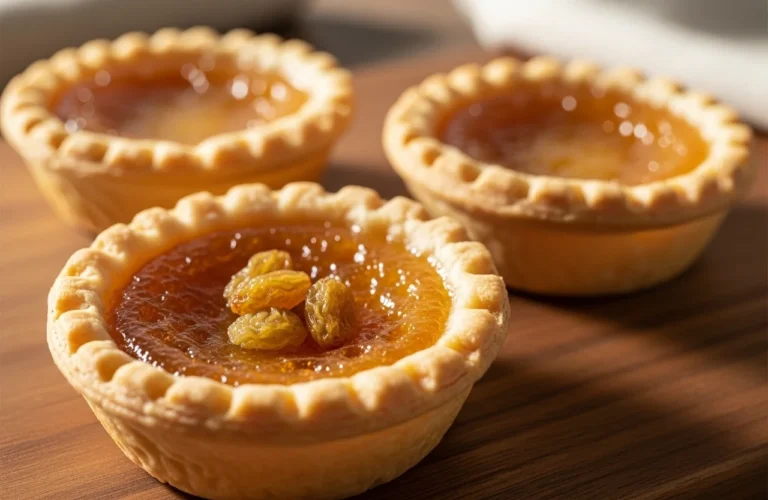
Mom’s Old Fashioned Butter Tarts are more than just a dessert; they’re a warm hug, a trip down memory lane, and a culinary masterpiece all rolled into one sweet package. If you’ve ever tasted that perfect balance of a golden, flaky crust cradling a gooey, buttery-sweet filling, you know exactly what I mean.
Here at Let Them Cooke, we believe some recipes are simply too precious not to share, and this classic butter tart recipe is definitely one of them. We’re diving deep into the art of making Mom’s Old Fashioned Butter Tarts, ensuring every bite is pure bliss.
What makes Mom’s Old Fashioned Butter Tarts uniquely delicious and nostalgic?
Mom’s Old Fashioned Butter Tarts carry a certain magic, don’t they? It’s not just the ingredients; it’s the feeling they evoke, a sense of home and comfort that few other treats can match. Every bite of these traditional Canadian dessert gems reminds you of simpler times, of kitchens filled with laughter and the sweet scent of baking.
The Secret Ingredient: Time and Love
Honestly, the real secret behind Mom’s Old Fashioned Butter Tarts isn’t found in a cookbook; it’s in the care and attention poured into each batch. It’s about taking your time with the flaky pastry crust, letting the butter melt just right, and ensuring the sweet butter tart filling achieves that perfect consistency. This dedication transforms a simple recipe into an unforgettable experience.
A Taste of Childhood Memories
For many, Mom’s Old Fashioned Butter Tarts are synonymous with childhood. That first bite, where the crust shatters delicately and the warm, sugary filling coats your tongue, is pure nostalgia. Whether you prefer pecan vs raisin butter tarts, the memory of that rich, buttery sweetness lingers long after the last crumb is gone. This connection to the past is what makes homemade dessert secrets so special.
Why They Stand Apart from Other Tarts
While there are countless delightful tart recipes out there, from Mini Fruit Tarts With Pastry Cream to a vibrant Mango Curd Tart Recipe, Mom’s Old Fashioned Butter Tarts hold a unique place. Their distinct balance of a crisp crust and a soft, often slightly caramelized filling sets them apart. It’s a humble dessert that delivers profound satisfaction, a true testament to vintage baking tips.
Which essential ingredients are crucial for authentic butter tart perfection?
To recreate the magic of Mom’s Old Fashioned Butter Tarts, you need to start with the right foundation. Each ingredient plays a vital role in crafting that signature taste and texture. Don’t cut corners here; quality makes all the difference in a classic butter tart recipe.
The Unsung Hero: Quality Butter
Butter isn’t just an ingredient in Mom’s Old Fashioned Butter Tarts; it’s the star. Opt for high-quality, unsalted butter for both your pastry and your filling. Its rich flavor and fat content contribute immensely to the flakiness of the crust and the luxurious mouthfeel of the sweet butter tart filling. Think of it as the heart of your traditional Canadian dessert.
Sweetness with Soul: Sugars and Syrups
The filling for Mom’s Old Fashioned Butter Tarts gets its characteristic sweetness and gooey texture from a combination of sugars and sometimes corn syrup or maple syrup. Brown sugar adds a deeper, molasses-rich note, while white sugar provides clean sweetness.
The syrup helps prevent crystallization and ensures that beautiful, flowing consistency we all crave in a butter tart. This is one of those homemade dessert secrets that makes all the difference.
Flavor Foundations: Eggs and Vanilla
Eggs bind the sweet butter tart filling together, giving it structure and a custard-like quality, while vanilla extract enhances all the other flavors. Use good quality vanilla in your Mom’s Old Fashioned Butter Tarts – it’s not just a background note, it’s a crucial aromatic component that elevates the entire experience. These simple additions are key to achieving an authentic classic butter tart recipe.
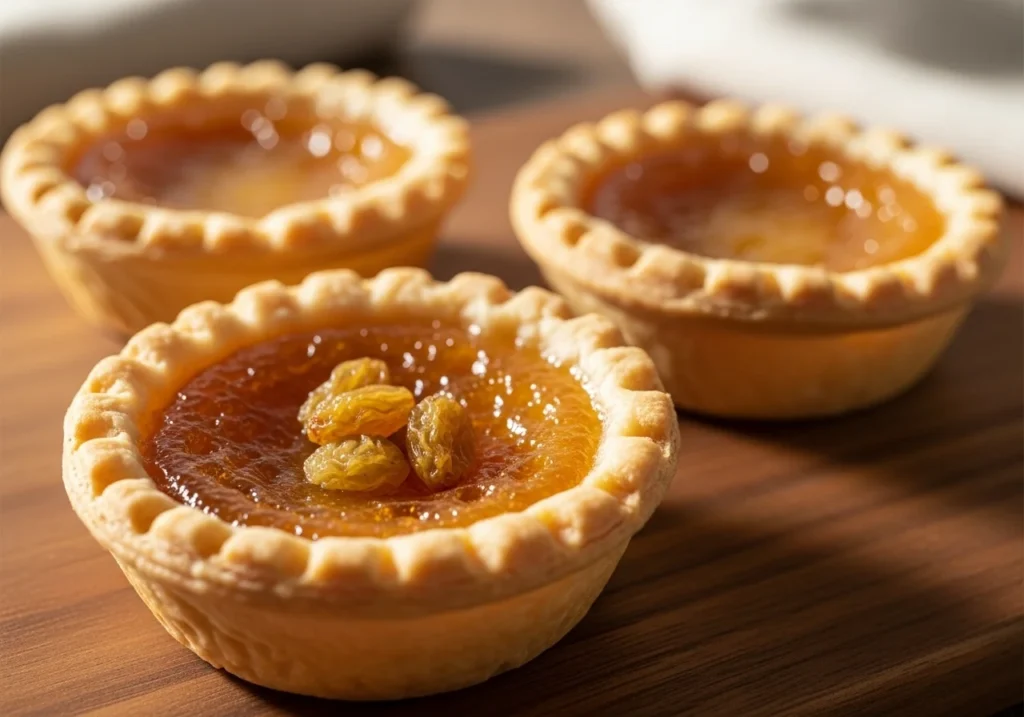
To Raisin or Not to Raisin? (Pecan vs raisin butter tarts)
Ah, the age-old debate! When it comes to Mom’s Old Fashioned Butter Tarts, whether you include raisins or pecans (or neither!) is a matter of personal preference. Some swear by the chewy burst of sweetness from plump raisins, while others prefer the nutty crunch of pecans.
If you’re a fan of the former, you might want to explore specific Raisin Butter Tarts recipes. Both create a delightful contrast to the gooey filling, making your homemade dessert secrets even more versatile.
How can you achieve that perfectly flaky crust and gooey, rich filling?
This is where the rubber meets the road! Nailing the texture of both the crust and the filling is what truly elevates Mom’s Old Fashioned Butter Tarts from good to absolutely legendary. It’s about technique, patience, and a little bit of baking intuition.
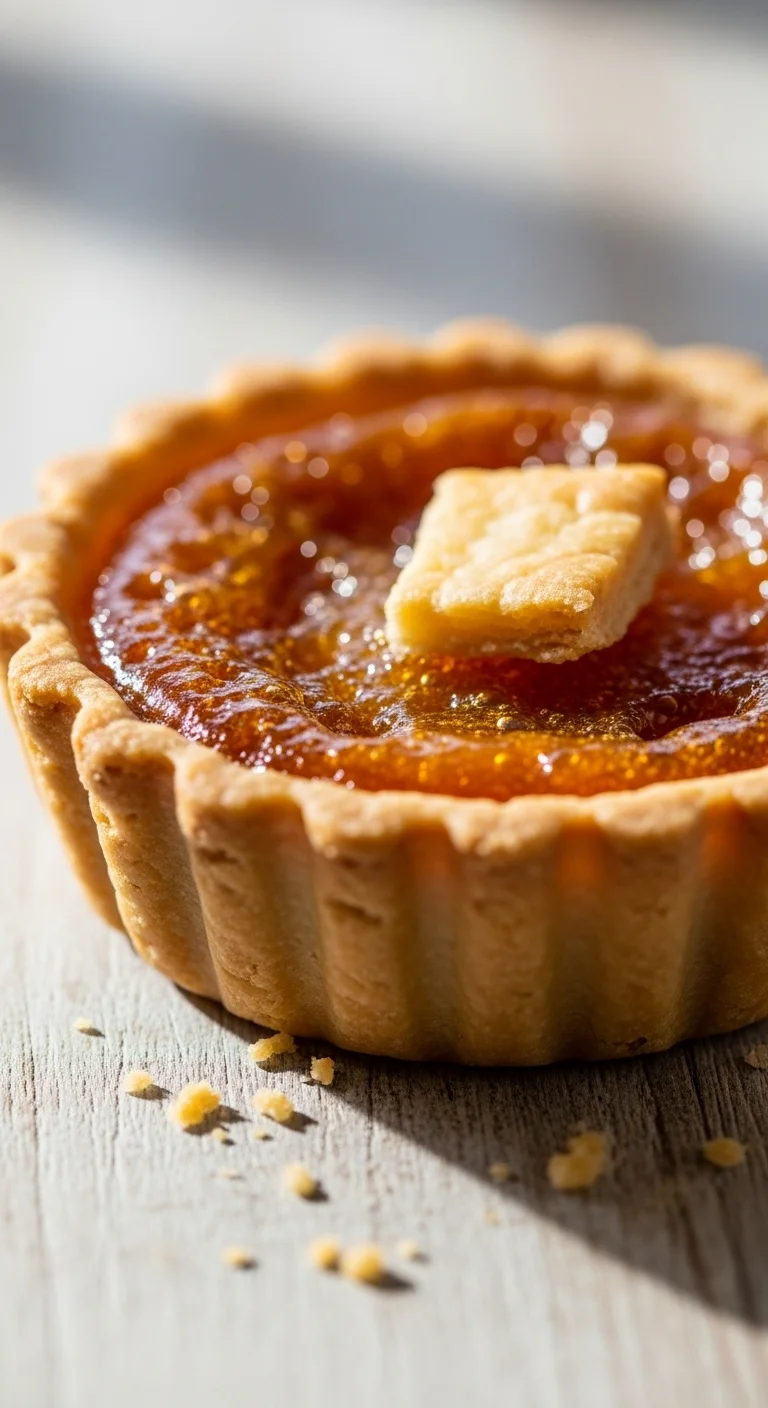
Mastering the Flaky Pastry Crust
For that ethereal flaky pastry crust, cold butter is your best friend. Cut it into small pieces and work it into the flour quickly, either by hand or with a food processor, until it resembles coarse crumbs with pea-sized butter bits.
This creates steam pockets as it bakes, leading to incredible flakiness. Don’t overwork the dough, and chill it thoroughly before rolling. If you’re looking for a shortcut, learning HOW TO MAKE MINI TART SHELLS can be a game-changer, but for Mom’s Old Fashioned Butter Tarts, homemade is always best.
“A truly great butter tart starts with a crust so tender it practically sighs when you bite into it. That’s the hallmark of a lovingly made pastry.”
Crafting the Sweet Butter Tart Filling
The sweet butter tart filling is deceptively simple but requires precision. Whisk your melted butter, sugars, egg, and vanilla until just combined. You don’t want to incorporate too much air, which can make the filling soufflé too much and then collapse.
Some recipes add a touch of vinegar or lemon juice to help with the gooey texture. This is part of the homemade dessert secrets that make Mom’s Old Fashioned Butter Tarts so special. For other delicious fillings, check out our Mini Lemon Meringue Tarts or Cherry Bakewell Tartlets.
Baking for the Perfect Gooey Center
Baking Mom’s Old Fashioned Butter Tarts requires vigilance. You want the crust to be golden brown and the filling set around the edges but still have a slight jiggle in the center. Overbaking will result in a firm, less gooey filling – a common butter tart pitfall.
Keep an eye on them; ovens vary, and the perfect bake time is often found by observing rather than strictly adhering to a timer. This guarantees that authentic traditional Canadian dessert experience.
Are there classic variations, and how do you avoid common butter tart pitfalls?
While the classic butter tart recipe is perfect in its simplicity, there are delightful variations to explore. Knowing how to adapt and troubleshoot ensures your Mom’s Old Fashioned Butter Tarts turn out beautifully every time.
Exploring Traditional Canadian Dessert Variations
Beyond the pecan vs raisin butter tarts debate, some bakers experiment with maple syrup for a distinct Canadian flavor, while others add a hint of spice like cinnamon or nutmeg to their Mom’s Old Fashioned Butter Tarts.
You might even find versions with coconut or chocolate chips, offering a fun twist on the traditional Canadian dessert. Exploring how to make Lemon Tartlets Recipe or Raspberry Vanilla Tarts can also inspire new flavor combinations for your butter tarts.
Troubleshooting Common Butter Tart Woes
One common issue with Mom’s Old Fashioned Butter Tarts is the dreaded leaky filling. This often happens if your pastry isn’t sealed well in the muffin tin or if it’s too thin. Another pitfall is a hard filling, usually caused by overbaking.
Keep your oven temperature consistent and don’t bake them past the ‘just set with a slight jiggle’ stage. A little attention to detail goes a long way in perfecting this classic butter tart recipe.
Vintage Baking Tips for Success
For truly exceptional Mom’s Old Fashioned Butter Tarts, consider using lard or a combination of butter and lard in your pastry for extra flakiness. Also, don’t rush the chilling process for your dough – it’s crucial for preventing shrinkage and maintaining shape.
These homemade dessert secrets, passed down through generations, are vital for achieving that perfect flaky pastry crust every time. Learning How to make tartlet shells with these tips can also benefit other tart endeavors.
What are the best ways to serve and store your homemade butter tarts for ultimate enjoyment?
You’ve put in the effort, and now it’s time to reap the rewards! Serving and storing your Mom’s Old Fashioned Butter Tarts correctly ensures every last one is savored to its fullest potential.
Serving Suggestions for Maximum Delight
Mom’s Old Fashioned Butter Tarts are absolutely divine on their own, perhaps with a cup of tea or coffee. However, for an extra special treat, serve them slightly warm, perhaps with a dollop of freshly whipped cream or a scoop of vanilla bean ice cream. The contrast of the warm, gooey filling with cold cream is simply irresistible. This is a traditional Canadian dessert that truly shines.
Storing Your Mom’s Old Fashioned Butter Tarts
To keep your Mom’s Old Fashioned Butter Tarts fresh, store them in an airtight container at room temperature for up to 2-3 days. If you want them to last longer, you can refrigerate them for up to a week.
For longer storage, butter tarts freeze beautifully for up to 3 months. Thaw them at room temperature or gently warm them in a low oven for that fresh-baked taste. These homemade dessert secrets ensure you can enjoy them anytime.
Sharing the Homemade Dessert Secrets
There’s immense joy in sharing the fruits of your labor, especially when it’s something as beloved as Mom’s Old Fashioned Butter Tarts. Package them beautifully for friends, bring them to a potluck, or simply gather your family around for a sweet moment. Spreading the love of this classic butter tart recipe is truly one of the best parts of baking. For more delicious inspiration, don’t forget to check out How to Make the Best Homemade Fruit Tart.
Key Takeaways
- Quality Ingredients Matter: Use the best butter, eggs, and vanilla for truly authentic Mom’s Old Fashioned Butter Tarts.
- Cold Butter for Crust: This is crucial for achieving that perfectly flaky pastry crust.
- Don’t Overbake: A slightly jiggly center means a perfectly gooey, sweet butter tart filling.
- Personalize Your Tarts: Embrace the pecan vs raisin butter tarts debate, or try other fillings to make them your own.
- Share the Love: Mom’s Old Fashioned Butter Tarts are best enjoyed with others, spreading the joy of this traditional Canadian dessert.
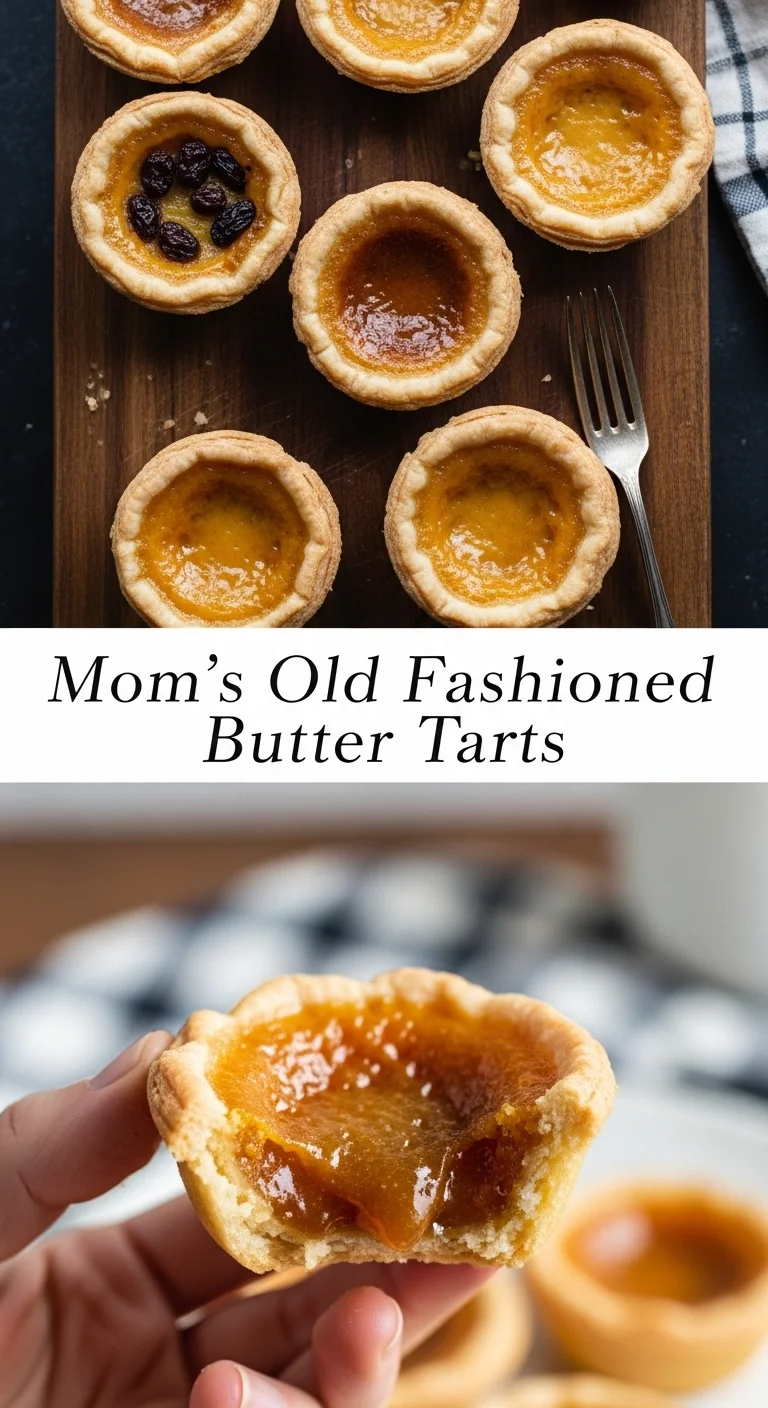
Mom's Old Fashioned Butter Tarts
Ingredients
Method
- Preheat the oven to 400°F (200°C).
- In a large bowl, combine the flour and salt. Cut in cold butter until the mixture resembles coarse crumbs.
- Add ice water, one tablespoon at a time, until the dough holds together. Chill for at least 30 minutes.
- In another bowl, whisk together melted butter, brown sugar, white sugar, eggs, vanilla, and corn syrup until just combined.
- Fold in raisins or pecans if desired.
- Roll out the chilled dough and cut it into circles to fit your tart pan. Place the dough in the pan.
- Pour the filling into each crust, filling just to the top.
- Bake for 20-25 minutes, or until the filling is set with a slight jiggle in the center.
- Let the tarts cool for at least 10 minutes before removing from the pan.
- Serve warm or at room temperature, optionally with whipped cream or ice cream.